Use the Microsoft Graph API as a Copilot plugin for a declarative agent
Recently, I came across an interesting use case building an HR agent allowing employees to ask common questions about company internal policies. These policies were made available to Copilot through a custom Graph Connector. However, during our tests, we realized for some questions, Copilot was struggling answering correctly even though answers were present in FAQ documents alongside the policy itself. To improve answers accuracy, we had the idea to extract the content from these FAQs and leverage the QnA feature of Microsoft Search. This way, we’ve added them as an additional source for our agent through an API pluigin (by default QnAs aren’t crawl into the semantic index and can’t be used in answers).
This blog post describes how to use the Microsoft Graph API as a Copilot plugin in a declarative agent. We take a generic example of a agent only retrieving data from QnAs content defined in Microsoft Search using the /search/query endpoint of the Microsoft Graph API.
This technique works for any entity types in Microsoft Search (ex: listItem, bookmark, etc.). However I don’t recommend to use it to pull items information from SharePoint or OneDrive as it duplicates what copilot already does behind the scenes with the semantic index.
The complete example is available on GitHub: https://github.com/FranckyC/copilot-pro-dev-samples/tree/main/samples/da-qna-graphapi-plugin
1. Get Microsoft Graph Open API spec file
As plugins rely on Open API specifications, the first thing to do is to get the specification for the Microsoft Graph API. Despite the complete Open API specification exsits, for perfomrance reasons (the complete file is 34MB!), we start with a smaller Search.yml subset available from here: https://github.com/microsoftgraph/msgraph-sdk-powershell/tree/dev/openApiDocs/v1.0
Download that file into your agent solution for example in apis/search.yml.
2. Extract the required operations from the specification
Even with a subset, the API specification still contains a lot of information. In our case, we are only interested by the /search/query endpoint. We use the Hidi comand line tool to generate the Open API spec only for that specific endpoint by using the following command:
hidi transform -d apis\search.yml -f json -o apis\graph_search.yaml -v OpenApi3_0 --op search_query --co
Where:
-d apis\search.ymlis the “raw” Open API to simplify.-o apis\graph_search.yamlis the new Open API spec file we wnat to use in our plugin.-v OpenApi3_0the version of OpenAI to use for the output file.--op search_querytheoperationIdin the input file corresponding to the endpoint we want to extract.
Now we have or spec only for the required endpoint, it is time to generate the Copilot plugin information.
3. Generate the Copilot plugin information
To generate the plugin information that we will be used by the Copilot agent, we use the Kotia tool. If not installed already, install the Kiota extension for Visual Studio Code.
Why using Kiota instead of the built-in Teams ToolKit plugin generation? The default Teams Toolkit plugin generation can struggle to generate plugins for complex property types like arrays or nested objects. Using Kiota will ensure > the plugin information is generated correctly.
Then from the Kiota options, add a new API description and select “Browse path” and select the file graph_search.yml you generated from the previous step:
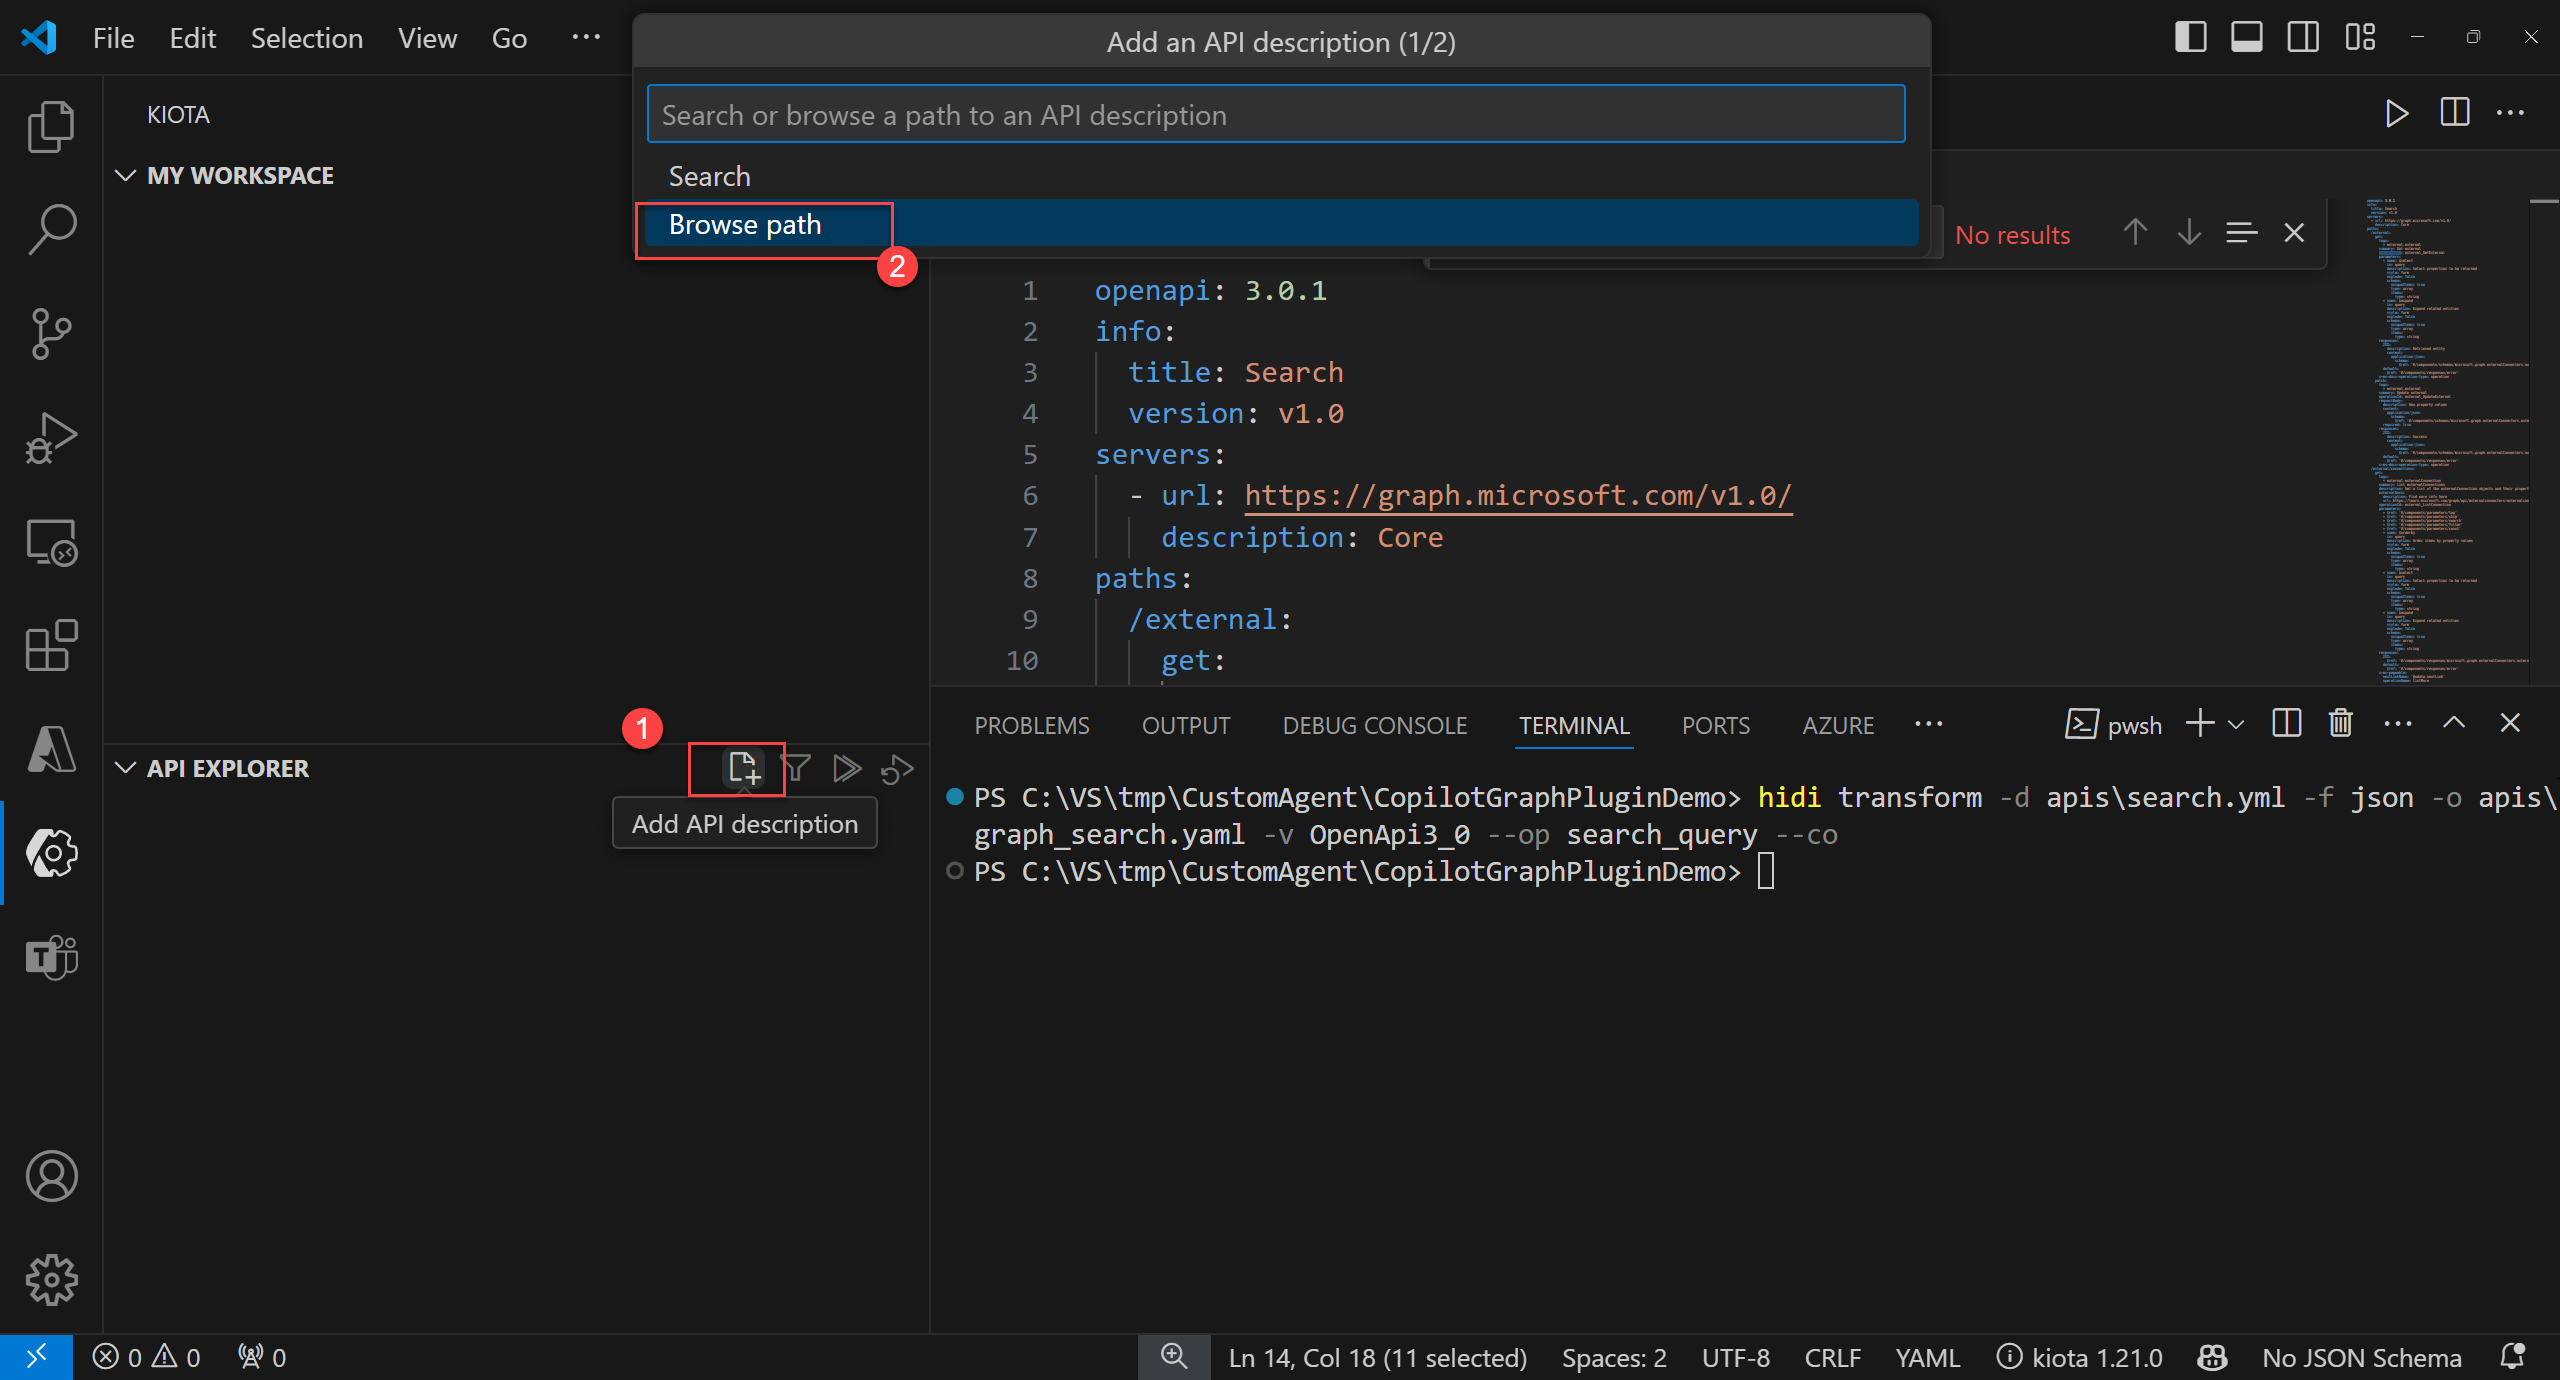
It should load all the available endpoints from the file. Add the endpoint (the ‘+’ sign on the POST line), the click on “Generate”:
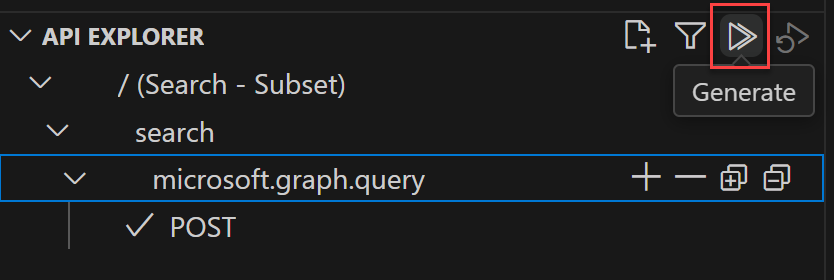
Select “Copilot Plugin” and give it a name, for instance msSearchPlugin:

For the folder, we recommend to generate file in a dedicated folder (ex: “plugins”):
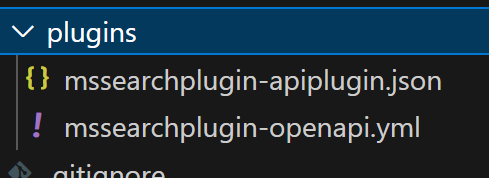
We can now import the plugin with Teams Toolkit to integrate it with the declarative agent.
4. Import the plugin with Microsoft Teams Toolkit
In Visual Studio, in the Teams ToolKit options, use the Add Plugin option and select _Import an existing plugin. Select the mssearchplugin-apiplugin.json manifest file (.json) and the Open API specification (.yml) from the plugin information generated by Kiota. Finally, select the declarative agent manifest file to integrate the plugin.
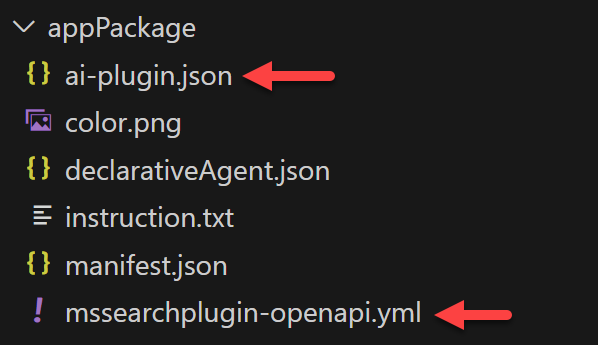
From here, you should see a ai-plugin.json and mssearchplugin-openapi.yml files generated under the “appPackage” folder:
Warning
Because QnAs are only available in the /beta endpoint, you need to manually update the base URL in the mssearchplugin-openapi.yml:
openapi: 3.0.1
info:
  title: Search - Subset - Subset
  version: beta
servers:
  - url: https://graph.microsoft.com/beta/
    description: Core
    ...
The Microsoft Graph API being protected by Entra ID, we need to specify authentication parameters to use it.
5. Add OAuth2 authentication
Open the mssearchplugin-openapi.yml file, look for the securitySchemes property and replace by the following (replace tenantid by your ID):
securitySchemes:
    azureaadv2:
      type: oauth2
      flows:
        authorizationCode:
          authorizationUrl: https://login.microsoftonline.com/tenantid/oauth2/v2.0/authorize
          tokenUrl: https://login.microsoftonline.com/tenantid/oauth2/v2.0/token
          scopes:
            QnA.Read.All: Read QnAs from Microsoft Search
Because the authentication to the API is performed through OAuth2, you need to first create a dedicated Entra ID application in your tenant and then register an OAuth connection in the Teams developer portal:
- Register an Entra ID application in Azure and add the API permissions
QnA.Read.All(delegated). Add thehttps://teams.microsoft.com/api/platform/v1.0/oAuthRedirectas a redirect URL for web platform in the Authentication settings.

- In the Teams developer portal, add a new OAuth client registration and register a new client with the following information:
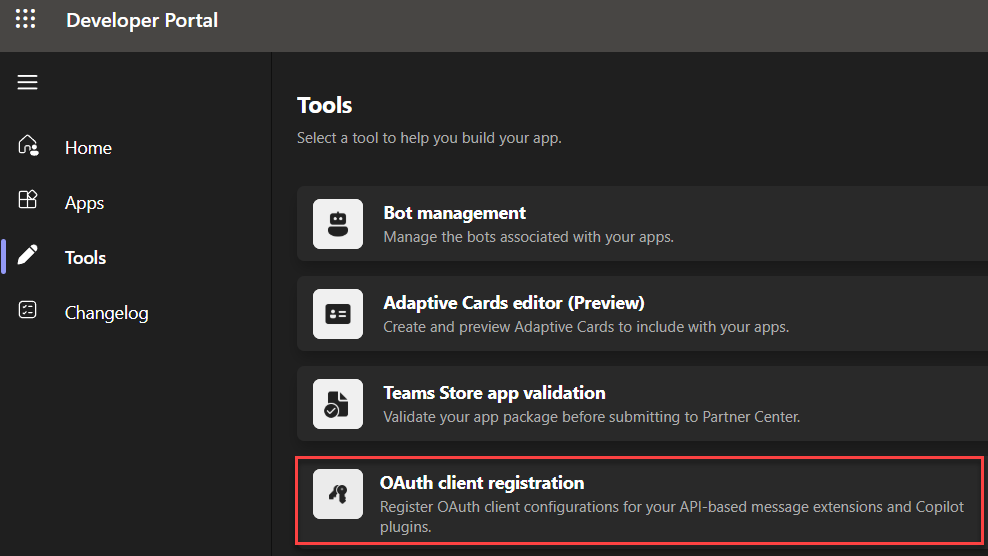
App settings
- Registration name: MicrosoftSearch
- Base URL:
https://graph.microsoft.com/beta(QnA are only usable through the beta endpoint) - Restrict usage by org: My organization only
- Restrict usage by app: Any Teams app (When agent is deployed, use the Teams app ID).
OAuth settings
- Client ID: <the entra ID application ID>
- Client secret: <the Entra ID application secret>
- Authorization endpoint: https://login.microsoftonline.com/tenantid/oauth2/v2.0/authorize
- Token endpoint: https://login.microsoftonline.com/tenantid/oauth2/v2.0/token
- Refresh endpoint: https://login.microsoftonline.com/tenantid/oauth2/v2.0/refresh
- Scope: QnA.Read.All
Save the information. A new OAuth registration key will be generated:
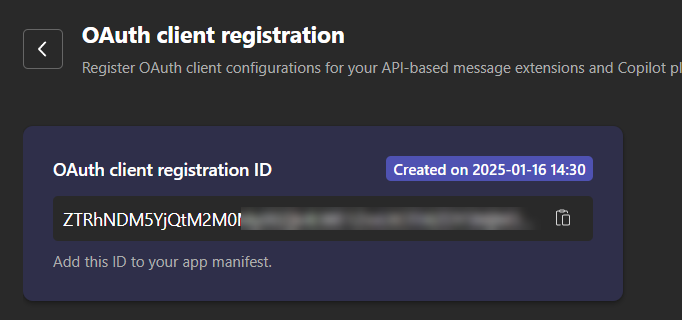
- Open the ai-plugin.json file and replace the auth property by the following, using the key from the previous step:
"auth": {
    "type": "OAuthPluginVault",
    "reference_id": "ZTRhNDM5YjQtM2..."
},
For CI/CD scenarios, you can also use a token like
${{OAUTH2_REGISTRATIONKEY}}and add the value in the.envfile.
To call the plugin, you need to make sure the instructions are clear for the agent so it can makes valid requests.
6. Update prompt instructions to call the plugin
Open the instruction.txt file and add the following prompt:
- You are a declarative agent answering user question according the a QnA knowledge base:
- For all questions, complement your answer by calling the 'action_1' plugin with the following API body format and by replacing the {query} token by the user query transformed as search keywords and translated to English. Use no more than 3 keywords enclosed by double quotes and separated by an 'OR' condition, for example "bing" OR "search" OR "security".
{
  "requests": [
    {
      "entityTypes": [
        "qna"
      ],
      "query": {
        "queryString": "{query}"
      }
    }
  ]
}
We are now ready to test our plugin!
7. Test with some QnAs!
For testing purpose, we use builtin Microsoft Search QnAs about the Bing search engine:
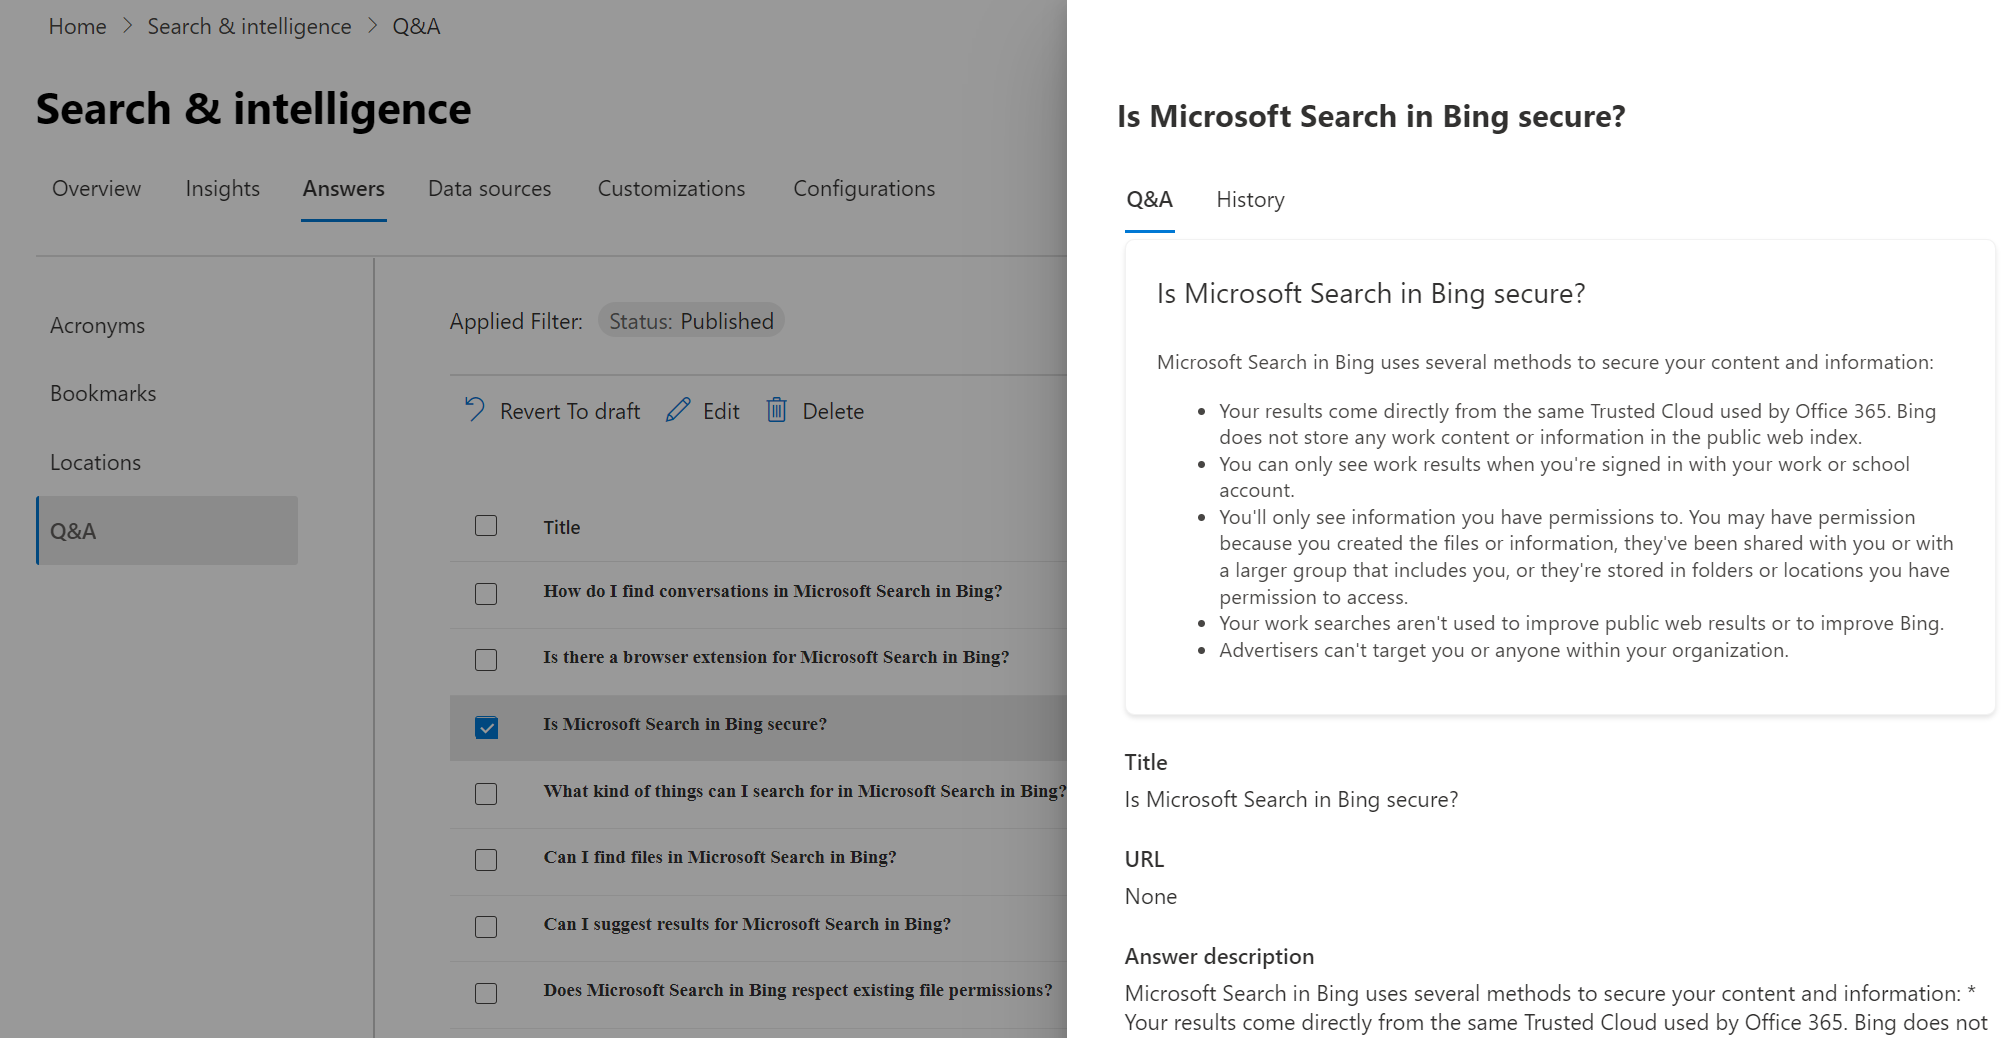
When using QnAs, the user query match is done according to the keywords defined for each QnA. This is an exact match so make sure keywords are relevant. Also we treat all keywords in English avoding us to provide QnA keywords for each language. That is why we ask the agent to translate all search keywords in that langauge.
Also, to make sure our plugin is triggered, we need to turn on the develper mode in Copilot using the prompt: -developer on.
In Visual Studio, from Teams Toolkit, in the Lifecycle section, click on “Provision” (you must have Teams custom app side loading enabled for your account). Then open the https://www.office.com/chat?auth=2 page. You should see your agent on the right column.
Youc can start asking questiosn based on your QnAs to trigger the plugin. You will have first to confirm the plugin action (this behavior can be changed), and then to authenticate.
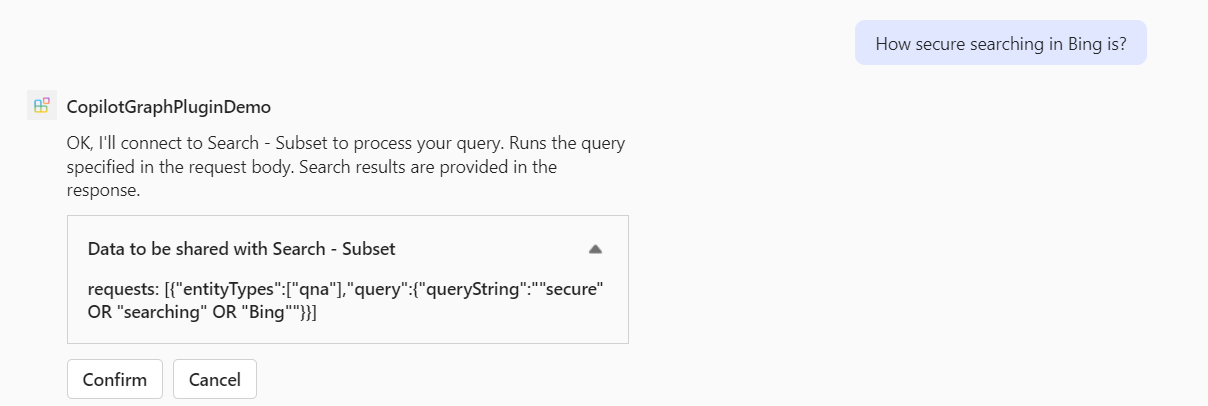

If a keyword match one of the QnA defined in Microsoft Search, the content will be used by Copilot to build the answer:
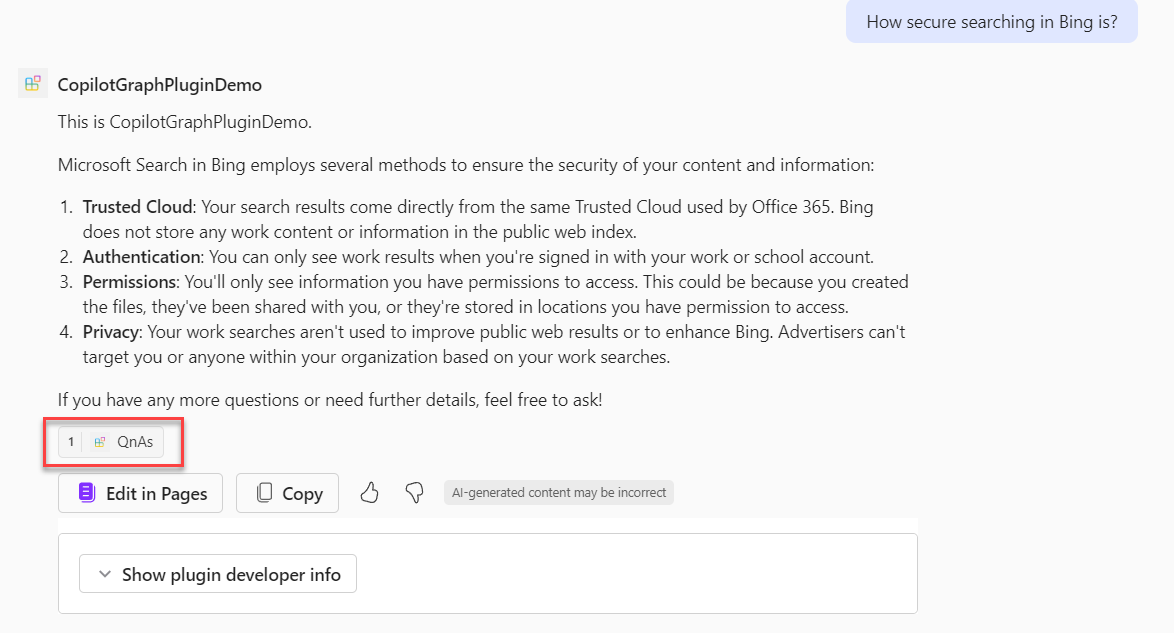
The verify the plugin has been called, you can expand the developer information to get the details:
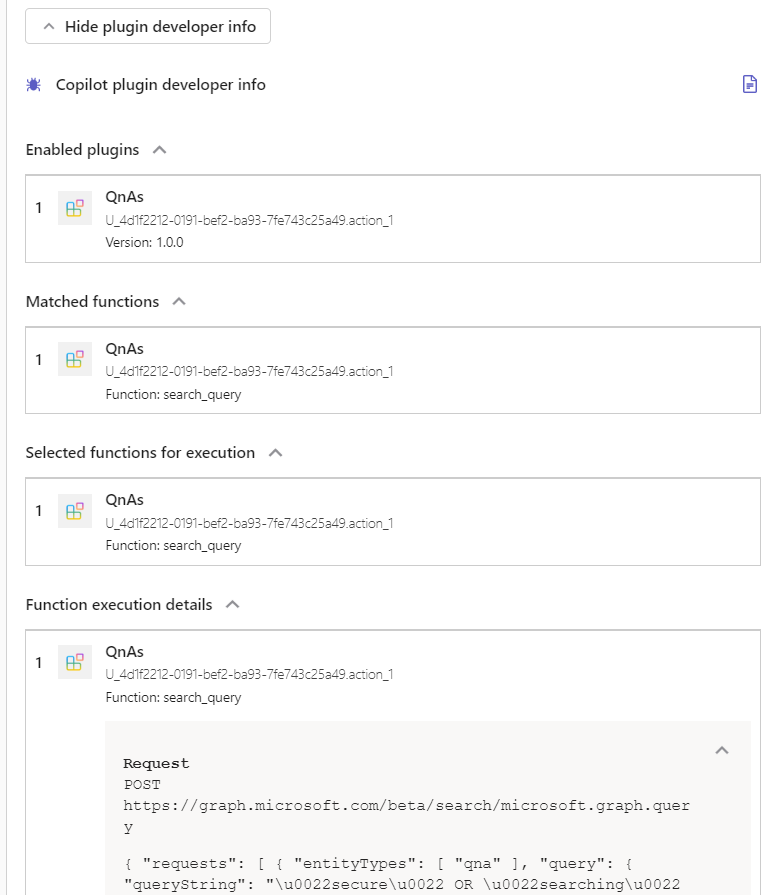
As you can see, the Microsoft Graph API can also be used as a plugin in a Copilot agent, enabling various possiblities. The QnA usage demonstrated here is a good strategy to enhance the grounded data and complement other sources to improve answers accuracy.